

Silver runs out faster than you expect in Crimson Desert. One minute you’re looting bandits and feeling flush, the next you’re staring at a gear upgrade you can’t afford and a camp expansion that costs more silver than you’ve seen in three hours of play. The economy in Pywel is unforgiving, and the game doesn’t do a great job of explaining how to keep up with it.
This guide covers every reliable method to farm silver — from the Hernand Bank robbery you can pull off in your first hour to late-game trade wagon routes that generate income on autopilot. Whether you want fast cash right now or a sustainable system that compounds over time, it’s all here, organized by when each method becomes available.
How Currency Works in Crimson Desert
Before getting into the farming methods, it’s worth spending thirty seconds on how money actually works here, because one mistake costs a lot of silver.
There are three tiers: copper at the bottom, silver in the middle, and gold bars at the top. 100 copper equals 1 silver. One gold bar is worth 500 silver — but only if you take it to a bank. Sell it to a regular merchant and you’ll get 190 silver instead. That gap matters a lot once you start finding and stealing gold bars regularly.
Coin Purses dropped by enemies aren’t items you sell — open them directly in your inventory and they convert straight to silver. A lot of players leave money on the table by treating them like loot.
Buy services for
Crimson Desert!
Get help with the parts of the game that take the most time. Browse available services or place a custom order.
Order
Why You're Always Broke: The Greymane Problem
Silver doesn’t just fund gear. It funds everything. Weapons, armor, food for healing, horse equipment, crafting materials, and the Greymane Camp — they all pull from the same wallet, and the camp alone is a serious drain.
There are no health potions in Crimson Desert. Food is the only way to restore health in combat, which means you’re constantly restocking. Run dry mid-fight and you’re in trouble. Add gear refinements, research upgrades (which cost around 500 silver per node in the late game), and regular camp donations on top of that, and the silver pressure never really stops.
The Greymane Camp is where things get expensive fast. The first expansion costs 250 silver. By the fourth expansion, you’re looking at 100,000 silver alongside thousands of units of stone, timber, food, and armaments. The camp isn’t optional either — it unlocks dispatch missions, trade routes, the wagon workshop, and storage upgrades that make everything else in the game more efficient. Underfunding it slows your entire progression.
The point is this: casual looting during normal play doesn’t cover the bills. You need dedicated farming sessions and a system for combining methods.
All Silver Farming Methods in Crimson Desert — Compared
Here’s a quick overview before the breakdowns:
| Method | Silver per Run | Best Stage | Risk |
|---|---|---|---|
| Hernand Bank Robbery | 75–500+ | Early | Bounty if caught |
| Goblin Mask Farming | 60–100 | Early | Low |
| Card Games (Duo / Five Card) | 300–600 | Any | Needs manual save |
| Bounty Hunting | Variable, high | Mid | Combat |
| Mercenary Escort Dispatch | Passive, scales | Mid–Late | None |
| Pickpocket Nobles | 1–3 Gold Bars/run | Mid | Reputation loss |
| Rare Resource Sales | 15–500+ per item | Any | None |
| Trade Wagon Routes | 200–400+/session | Late | Bandit attacks |
| Bank Investment | 50–55% return | Mid–Late | RNG loss risk |
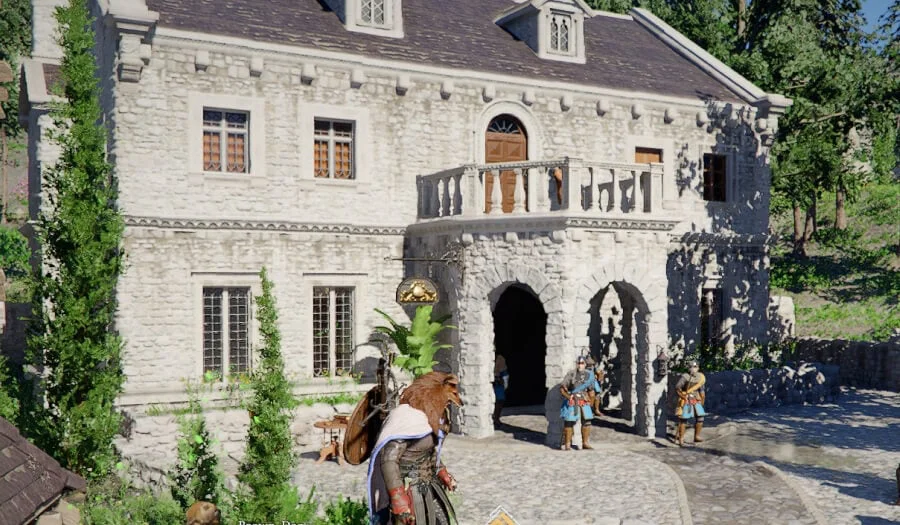
How to Rob the Hernand Bank and Get Easy Early Silver
This is the fastest silver injection available in the first hour of the game. The bank is located west of the inn in Hernand. Each item inside the treasure chests is worth 40 or more silver, and you can do this run before you’ve done much else.
What you need: a Mask (10 copper from Grimrak, behind the farmhouse east of Muckroot Ranch) and a Key (30 copper from the same vendor). That’s 40 copper total — a minimal upfront cost for a significant payout.
How the robbery works:
- Save your game manually before going in
- Enter the left locked door of the bank and close it behind you
- Open treasure chests and steal boxes until your inventory is full
- Watch the theft detection meter in the top right corner — wait for it to disappear before leaving
- Exit clean to avoid triggering a bounty
The loot boxes inside reset every three in-game days, so this run is repeatable. The chests are one-time only. Total take per full run is around 75 silver, but that jumps significantly if you find and sell gold bars separately.
Speaking of which — Lioncrest Manor in Hernand has a Gold Bar hidden inside the chimney on the ground floor. Take it to the bank for 500 silver, not to a merchant. The difference between bank and merchant rates for gold bars is one of the most important things to know in this game.
One thing to watch: every stolen item costs 5 Hernandian Contribution EXP. Strip the whole bank repeatedly and you’ll start losing access to faction shops and quests in the region. Hit the boxes on cooldown, skip the chests after the first visit, and you stay in good standing.
Goblin Mask Farming — The Best Repeatable Early Game Run
Head to the Sunrise Plains, south of the Greymane Camp in Howling Hills. This area has Fundamentalist Goblins roaming in groups, and they drop Crude Devil Masks at roughly a 25% rate per kill. Each mask sells to any merchant for 13.71 silver.
That number sounds small, but a 10-minute run on horseback through the Plains — killing groups quickly and looting before bodies disappear — can net 60 to 100 silver. The goblins respawn after about two in-game days, so you can run this on a regular cycle alongside other activities.
A pet makes a noticeable difference here. Bodies vanish faster than you’d think, and a pet looting alongside you means you’re not missing drops while moving to the next group. If you want denser enemy clusters and better loot per session, the areas around Fort Perwin have tighter mob packs and are worth the trip once you’re comfortable with the area.
Coin Purses from any enemies you fight are also worth grabbing. Open them immediately — they’re direct currency, not items to sell.
Card Games in Crimson Desert: The Fastest Silver When You Know What You're Doing
Gambling is the highest silver-per-minute method in the game, and it’s available almost immediately. There are two venues with different stakes.
Duo table at Hernand is your starting point. The stakes are lower, but the mechanic is the same. Save your game manually before sitting down, then go all-in on the first draw. The AI opponents are aggressive and call bets even with weak hands — that predictability is the whole exploit. Win: save and repeat. Lose: reload and try again.
Five Card at Beighen Village is where the real money is. Buy-in is 150 silver per session, and with two or three NPC opponents all going all-in, a single winning hand returns 300 to 600 silver. That’s a 2x to 4x return on a good hand.
The hand rankings you need to know:
- Prime Pair (Red 3 + Red 8) — best hand in the game, beats everything
- Superior Pair (Red 1 + Red 3 or Red 8) — strong second, worth going all-in
- Ten Pair or any regular Pair — go all-in without hesitation
- Anything weaker — consider folding rather than committing your whole stack
Once you unlock the hide-hand command, you can influence which cards you receive during the deal. It doesn’t guarantee a win, but it improves your odds meaningfully. There’s a detection limit, so don’t use it every hand.
There’s also a gambling den in Tomasso with a 300 silver buy-in — once you have the capital, that table offers bigger pots and faster gains than the Beighen table.
Bounty Hunting in Crimson Desert: How to Get Paid to Fight
Bounty boards are found near guard captains in most major settlements. Picking up a contract before heading out means you’re getting paid for fights you’d be having anyway. The base payout varies, but contracts also send you into areas full of enemies — meaning you’re collecting loot, coin purses, and rare drops on top of the contract reward.
Always read the contract details before accepting. The time investment per bounty varies a lot, and some contracts pay significantly better than others for similar difficulty.
Your first bounty is actually a tutorial. In Chapter 2, the Hernand Guard Captain sends you after Jeffrey the Pickpocket. Complete it and he hands you a mask as a reward — which is how the game teaches you about the crime system. It’s worth doing early regardless of whether you’re planning to steal anything, because that mask opens up the entire criminal income stream.
The best approach to bounties isn’t hunting them one at a time. The ideal session looks like this: pick up a bounty, ride toward the target, clear any bandit camps along the route, loot everything, complete the contract, and then sell the loot. Three income sources from one trip — contract payment, enemy loot, and any coin purses from camp clears.
Mercenary Dispatch Missions: Passive Silver While You Play
Once your camp is established in Chapter 3, Escort dispatch missions become available. These are arguably the best low-effort income source in the game because they run in the background while you’re doing anything else.
The Oakenshield Manor mission in Hernand is the best early Escort option. Assign a comrade, start the mission, and it generates silver passively over the course of several in-game hours. You don’t have to do anything. The income is modest compared to active methods, but it stacks with everything else.
As your camp grows and you push into mid-game, better locations unlock. Thornbriar Food Storage, Sungrove Manor, and Azerian Manor in Demeniss are strong mid-game picks for silver-generating Escort missions. After Chapter 10, Gorthak Ironworks in Delesyia comes online and is one of the most productive dispatch points in the game.
Two rules to keep dispatch missions profitable: always have at least one Escort mission running at all times, and match your comrades to missions by skill. A misassigned roster can prevent a mission from launching entirely, which means lost passive income for the whole cycle.
How to Pickpocket Nobles and Steal Gold Bars Without Getting Caught
To steal or pickpocket anything in Crimson Desert, you need a Mask equipped. Without it, the prompt stays greyed out. Once you have one on, bump into an NPC with a short running start and you’ll get a two to three second window to pickpocket them.
- The best targets are nobles — they carry more valuable items and occasionally carry Gold Bars. Each one taken to the bank is worth 500 silver.
- The best pickpocketing location in the game is the Deminis Wildlife Park. There are no guards, so you can work the area without triggering a bounty. Use your Lantern to scan NPCs before targeting them — it shows what they’re carrying, so you’re not wasting attempts on people holding worthless items. If nobody in the area is carrying Gold Bars, teleport to the nearest Abyss Nexus to reset the zone and try again.
For players who plan to pickpocket regularly, the Great Thief’s Gloves from the Secret of the Lost Seal quest (House Serkis questline) are worth getting. They remove detection risk for theft actions entirely. There’s a 30-minute cooldown between uses, but that’s enough for a productive session.
The save-reload approach works well here too. Save before a pickpocketing run, work through several NPCs, and if the yield is poor, reload and approach different targets. The downside of theft is the Contribution EXP penalty — 5 points per theft regardless of whether anyone sees you. Plan sessions around that limit rather than going fully criminal in one sitting.
Selling Rare Resources and Ore: Steady Silver With No Combat Required
Mining is underrated as a silver source because it requires no combat, no save-scumming, and can be done in five-minute chunks between other activities. Get a pickaxe from Rhett’s Request early in the game and you’re set up for the whole playthrough.
Best mining locations:
- Hernand Highlands Cavern (southeast Hernand, west of Specter’s Hideout) — about a dozen diamonds per visit. Diamond deposits yield up to 15 silver each.
- Heart of the Saint cave at Three Saints’ Falls (north of Hernand) — 25 to 30 Silver Ore per visit, the largest single deposit in the game. You need the Stab skill and Force Palm from Chapter 1 to access it.
- Stoneback Crab Wetlands (island between Demeniss and the Crimson Desert region) — compact area with a full range of ore types including Copper, Azurite, Epidote, and Garnets. Good for accessory upgrade materials and selling surplus.
- Witchwoods (southwest of Hernand) — Bloodstone, which sells for noticeably more than basic ores.
For ore prices: Azurite sells for around 0.95 silver per unit, Scolecite for 1.03, and Diamond for 2.28. Not impressive individually, but a full mining run through one of the locations above adds up quickly, and every deposit respawns over time.
Red Croton Flowers south of Hernand are also worth adding to your route. They stack 50 to a single inventory slot and sell for up to 60 silver per run. They respawn on a weekly in-game cycle — easy passive top-up income.
Trade Wagon Routes: The Highest Ceiling for Late-Game Silver
This is the most complex method on the list, but once it’s running it generates more silver per session than almost anything else. The setup requires reaching Camp Level 2 and completing a specific chain of quests.
How to unlock the wagon:
- Complete “A Rumor in Glenbright Farm” to recruit Brice as your Wagonmaster
- Complete “A Rumor in St. Halssius” to recruit Arnold (your Engineer)
- Assign Arnold to the Timberturner Wainwright dispatch mission to build your wagon
Don’t try to skip steps — stolen wagons from the open world can’t be used for trade runs. You need to build your own.
Running a trade route:
Pick up Trade Goods from enemies, camp resources, or Trading Posts. Have Carl at camp package them for 100 copper each. Important: don’t package anything until you have at least 25 of the same type — the Goldleaf Guildhouse won’t buy below that minimum, and packaging is irreversible. Load the wagon, check market prices on your map before leaving (they fluctuate every in-game week), and drive to whichever Trading Post is currently paying a premium for what you’re carrying.
On the return trip, buy discounted local goods at the destination and sell them at a different post. Never drive an empty wagon home.
Expected yield per session is 200 to 400+ silver depending on route and current prices. Trading also pairs well with exploration — you can haul goods while traveling to new areas and stop to mine or clear bounties along the way. The one real hazard is bandits. A loaded wagon is a target, so make sure your combat is solid before running valuable cargo.
Bank Investment: Turn Gold Bars Into Compounding Returns
The Hernand Bank offers a passive investment system that most players ignore in early game because the startup cost feels steep. It’s 600 silver to get going: 500 for a Gold Bar and 30 to 55 silver for a Personal Strongbox Permit.
Once set up, deposit a Gold Bar and choose a risk profile. Payouts hit every three in-game days.
| Risk Profile | Return Range | Notes |
|---|---|---|
| Aggressive | 0–2% | Barely worth it |
| Proactive | 15–20% | Best balance of return vs. risk |
| Offensive | 50–55% | High variance, can lose the bar |
The save-reload approach makes Offensive viable without real risk. Save your game ten minutes before the payout timer expires, check the result, and reload if it’s poor. Repeat until you get a strong return. It takes patience but it’s essentially a guaranteed 50%+ return if you’re willing to cycle saves.
Proactive is the better option if you’d rather skip the save manipulation. A consistent 15 to 20% return every three in-game days compounds well over a full playthrough, especially once you’re stacking multiple gold bars.
Crime Beyond the Bank: Stealing From Manors, Markets, and Merchants
The Hernand Bank robbery is the most efficient crime, but it’s not the only place worth hitting. The Royal Trading Post’s Product Storage building in Hernand alone contains dozens of containers and can yield around 90 silver in a single run.
Noble estates and manors are the best targets outside of the bank. Jewelry Boxes and Paintings are the highest-value container loot — lightweight and worth serious silver at a fence. Strongboxes in certain buildings require solving a mechanical puzzle before you can loot them, but the payoff is usually worth the extra thirty seconds.
Stolen goods can’t go to regular merchants. You need a Black Market vendor — there are nine locations across the map, including one on Hernand’s west side southeast of the jail. Stolen animals go to the Livestock Black Market near Hernand. Stolen wagons go to the Wagon Fence east of Hernand along the Nas River.
If you’re caught in the act, the Wanted System gives you a chance to escape. Exit the red search zone on your minimap before a witness reaches a guard, and the only penalty is a 5-point Contribution loss in the region — no bounty, no guards. If you’re spotted directly, the fine escalates significantly. Clear any bounties at the Church of Hernand using a Writ of Absolution.
The Best Silver Farming Loop — How to Combine Methods at Each Stage
Individual methods are fine. Combining them into a loop is where the real efficiency comes from.
Skip the Grind: Order Professional Silver Farming
Farming 100,000 silver for the Fourth Camp Expansion takes serious time — and that’s before gear upgrades, food, bounty prep, and research costs all start competing for the same pool. If you’d rather spend your hours actually playing instead of running the same goblin loop for the fortieth time, professional silver farming handles the grind for you.
- Silver packages for every stage — starter stack to full camp funding
- Fast delivery, no account sharing required
- Handled by players running these farms every day
Buy services for
Crimson Desert!
Get help with the parts of the game that take the most time. Browse available services or place a custom order.
Order
7 Silver Farming Rules That Make Every Method More Efficient
These apply regardless of which methods you’re running:
- Always take Gold Bars to the bank. 500 silver at the bank, 190 at a merchant. Never sell to a regular vendor.
- Keep at least one Escort dispatch mission running at all times. Free passive silver in the background, every session.
- Loot bodies immediately. They disappear faster than you’d expect. Don’t finish a fight before starting to loot.
- Expand inventory before almost anything else. More bag space means more loot per run and fewer return trips to vendors.
- Sell learned recipe pages immediately. Once you learn a recipe, the physical page is worthless to you but sells for copper or silver at any vendor.
- Don’t package Trade Goods below 25 units. The fee is irreversible and you can’t sell below the minimum at the Guildhouse anyway.
- Use save-reload for RNG-dependent methods. Card games, bank investments, and pickpocketing all become significantly more profitable when you can control for bad luck.