

Expedition 3 went live on April 28, 2026, alongside the Riven Tides update — and if you played either of the first two Expeditions, the rules you learned no longer apply. Embark dropped the Coin and Stash value requirement entirely and replaced it with a damage-based challenge. That’s a bigger shift than it sounds.
The old system rewarded careful, selective looting. Players who extracted safely with heavy stashes and full pockets earned the most skill points. Aggressive raiders who burned through gear in long fights were actually at a disadvantage. Embark clearly noticed, because Expedition 3 flips the incentive completely: now the players who shoot the most win.
This guide covers the exact damage thresholds you need to hit, how the system counts damage, what rewards you’re working toward, what’s new on the Riven Tides map, and how to run your sessions efficiently without burning out across the 13-day window.
How Expedition 3 Damage Thresholds Work — Exact Numbers
Here’s what you need to deal to unlock each skill point during the Expedition window:
| Skill Points | Total Damage Required |
|---|---|
| 1 | 5,000 |
| 2 | 30,000 |
| 4 | 50,000 |
| 5 | 100,000 |
The jump from 10,000 to 30,000 is the steepest relative increase, so don’t treat the first two skill points as a warm-up and then assume the rest follows easily. Budget your sessions around that third threshold.
To put these numbers in context: Embark says a strong raid can produce 8,000 to 10,000 damage. Destroying 20 Bastions across multiple runs equals roughly 100,000. That means hitting the cap across a 13-day window requires around 10 to 13 focused raids — less than one per day. The window is long enough that you don’t need to marathon sessions.
Buy services for
ARC Raiders!
Get help with the parts of the game that take the most time. Browse available services or place a custom order.
Order
What Damage Actually Counts (And the One Thing That Doesn't)
Any weapon counts. Any gadget counts. You can deal damage to ARC enemies, other players, or a mix of both — it all goes toward your total. The only exception is the practice range. Damage dealt there doesn’t register.
A few things worth knowing:
- You don’t need a kill for damage to count. Hitting an enemy, retreating, and losing the engagement still adds to your total.
- There’s no bonus for specific enemy types, so target whatever you can fight reliably.
- Gadgets with area damage — grenades, turrets — are useful for padding your total without spending a lot of ammo on a single target.
How to Sign Up for Expedition 3 (And What Last Call Means)
Finishing your Caravan doesn’t sign you up for the Expedition. These are two separate steps, and missing this distinction has caught people off guard in previous windows.
The window opened April 28 at 13:00 CEST and closes May 11 at 09:00 CEST. All signed-up players depart automatically when the window closes.
If you missed the sign-up deadline, there’s now a Last Call option. It lets you join the Expedition after the window has already opened. The catch: you won’t earn skill points or rewards from the damage challenge. You can still depart, but you get none of the progression bonuses tied to Expedition 3.
All Expedition 3 Rewards — Cosmetics, Bonuses, and Buffs
Rewards split into three groups.
Permanent cosmetics:
- Patchwork Outfit (Evolved) — helmet, bandolier, and leg accessories, with White/Red and Black/Green color options. This completes the full Patchwork set across all three Expeditions.
- Scrappy Turban — new and exclusive to Expedition 3.
- Expedition Indicator Icon upgraded to its third-tier visual.
Permanent account bonuses:
- +12 stash slots. Base max is 280. Three Expeditions bring the total to 316.
- Up to five skill points from the damage challenge.
Temporary buffs (last until the next Expedition):
| Expeditions Completed | XP Boost | Scrappy Materials | Repair Value |
|---|---|---|---|
| 1 | +5% | +6% | +60% |
| 2 | +10% | +12% | +70% |
| 3 | +15% | +18% | +80% |
The repair value buff is the one that actually changes how you play day-to-day. At 80%, you can run riskier loadouts without the same financial penalty on death.
Catch-Up Skill Points — Rules for Returning Players
If you completed Expedition 1 or 2 but didn’t earn all five skill points, you can catch up during Expedition 3. Two things to know about how this works:
First, you have to finish the damage challenge before catch-up becomes available. The damage thresholds come first — you can’t buy back missed skill points and skip the active requirement.
Second, each missed skill point costs 300,000 coins or stash value. The cap is five catch-up points per window.
So if this is your third Expedition and you’ve maxed everything, the damage challenge is still the entry requirement. Complete it, then handle any catch-up points from there.
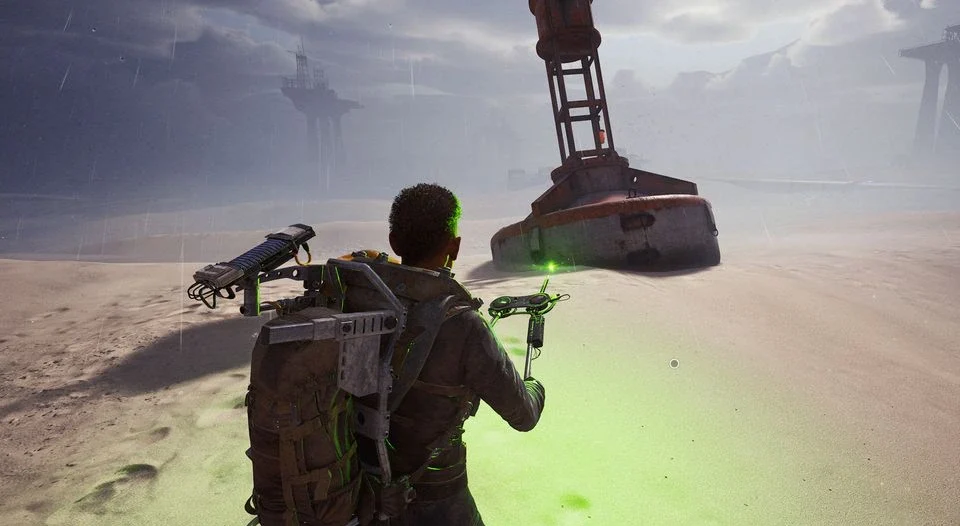
What's New in Riven Tides — The Coastal Map and New ARC Enemy
Riven Tides brings the first coastal biome to Arc Raiders. The map covers the Panorama Azzurro area — an abandoned resort and working harbor that was evacuated before the events of the game due to its exposure to ARC attacks from the sea.
The two main areas:
- Exodus Hotel — the resort complex, including a beachfront, pool, rooftop bar, and sun-deck. Tighter interior spaces, better for close-range engagements.
- Harbor Dockyard — the industrial section, with cranes, stacked shipping containers, a customs house, a stacking yard, and a sea wall. More open sightlines and denser ARC patrol routes.
A new large ARC enemy now patrols the skies above the map. Its exact mechanics weren’t confirmed before launch — Embark left this deliberately vague, calling it something players need to discover in-raid. A new map condition is also active, widely expected to involve flooding or rising water based on the scout reports released before launch.
There’s also a new Beachcombing mechanic. Players with the Dockmaster’s Detector can uncover buried loot along the coastline, though some of those discoveries come with surprises.
Best Strategies to Hit 100,000 Damage in the Riven Tides Window
Choosing Between ARC and PvP Targets
ARC enemies respawn between raids and follow predictable patterns, making them the safer source of consistent damage. The Harbour Dockyard has dense ARC spawn clusters, particularly around the stacking yard and sea wall patrol routes.
PvP damage can push your total faster in a single session, but it’s riskier — you spend more resources, die more often, and each death costs you time that could go toward reliable ARC grinding. If you’re comfortable with PvP and your squad runs well, mixing it in makes sense. Solo players are generally better served by farming ARC methodically.
Best Zones on Panorama Azzurro for Damage Output
The Harbour Dockyard is the most efficient area for pure damage farming. ARC density is high, the open layout gives you room to engage without cornering yourself, and Bastion targets can absorb a lot of fire per kill.
The Exodus Hotel interior is better for players who prefer PvP. Corridors funnel engagements and make it harder for opponents to disengage. If you’re pushing for damage fast, the hotel works — just expect to trade gear for it.
The Sea Wall and Beachfront are exposure-heavy. Good sightlines for long-range weapons, but you’re visible from multiple angles. Best used if you’re confident in your positioning, less ideal for grinding without interruption.
Loadout Setup for Damage Farming
High sustained DPS beats burst damage here. Weapons that land hits reliably across multiple enemies per magazine accumulate damage faster than one-shot-kill tools that leave you reloading after each target.
Area gadgets — grenades, especially anything with a splash radius — are good for adding damage to multiple enemies in a cluster without spending extra ammo. If you’re near a group of smaller ARC units, one grenade can add 1,000 to 2,000 damage to your session total without a real cost.
On Augments: Embark noted in the Riven Tides patch notes that Combat Augments are underperforming and a balance pass is coming. The Combat Mk. 3 Flanking Augment specifically has not found its place yet. Don’t build your damage farming strategy around Combat Augments right now — you may be working around a disadvantage rather than with it.
Session Planning — How to Spread It Across 13 Days
You need 100,000 damage across 13 days. At 8,000 per solid raid, that’s 13 raids. At 10,000, it’s 10.
One focused raid per day finishes the challenge with days to spare. Two short sessions every other day gets you there just as easily. The point: you don’t need to grind this. The window is generous on purpose — Embark extended it from five days to 13 after the community pushed back — so treat it as background progress rather than a sprint.
Bank early damage in the first few days. If something comes up midway through the window, you’ll already have a buffer.
Buy services for
ARC Raiders!
Get help with the parts of the game that take the most time. Browse available services or place a custom order.
Order
Common Expedition 3 Mistakes to Avoid
- Signing up late or not at all. Completing the Caravan doesn’t count as registration. Sign up the moment the window opens.
- Relying on the practice range. Damage there does not count toward your total.
- Waiting until the final weekend. The window is long, but leaving 100,000 damage for three days is unnecessary pressure.
- Skipping the damage challenge to try catch-up first. The system won’t let you access catch-up skill points until you’ve hit the damage thresholds. Do them in order.
- Running Combat Augments expecting strong results. The balance pass hasn’t happened yet. Pick weapons you trust, not Augments you’re hoping will perform.
Final Thoughts
The damage-based system is a better design than what came before. It rewards the way most people actually want to play — going into raids, fighting things, and extracting. You don’t need to calculate stash value after every run or cherry-pick low-risk looting routes to stay profitable.
Sign up on April 28, run consistent sessions across the 13-day window, focus your time in the Harbour Dockyard for reliable ARC damage, and you’ll hit five skill points without any particular pressure. The Patchwork Outfit set completes with this Expedition, and the +80% repair value buff at three completions is worth the effort on its own.