

Outpost is Marathon’s most rewarding map — and the most locked-down. Every high-value area sits behind a door that needs a specific code, keycard, or action to open. Players who come in without a plan leave empty-handed. Players who know the system walk out with gear they can’t find anywhere else.
This guide covers every locked room on Outpost: how the clearance code system works, the three ways into Pinwheel Base, how to access the Command Wing, and how to unlock Exfil Stations before the timer forces a panic run. Everything here is tied to how the map actually functions — no guesswork, no filler.
Whether you’re hitting Outpost for the first time or you’ve been dying at the Pinwheel door every match, this breakdown will fix that. Let’s get into it.

Why Outpost Is Built Around Locked Rooms (And Why That Matters)
Outpost is unlocked at Runner Level 12 and it plays completely differently from Perimeter or Dire Marsh. The layout is compact and vertical — fights happen fast and close quarters. But the bigger difference is the loot structure. On most maps you can free-roam and scavenge. On Outpost, the best gear is locked. If you don’t open the right rooms, you’re competing for scraps.
The map is built around an active UESC facility. That means scan drones, tripwires, environmental hazards like acid rain, and waves of UESC soldiers that spawn when you start interacting with terminals. The locked rooms aren’t just a puzzle — they’re a threat. Every door you open announces your position.
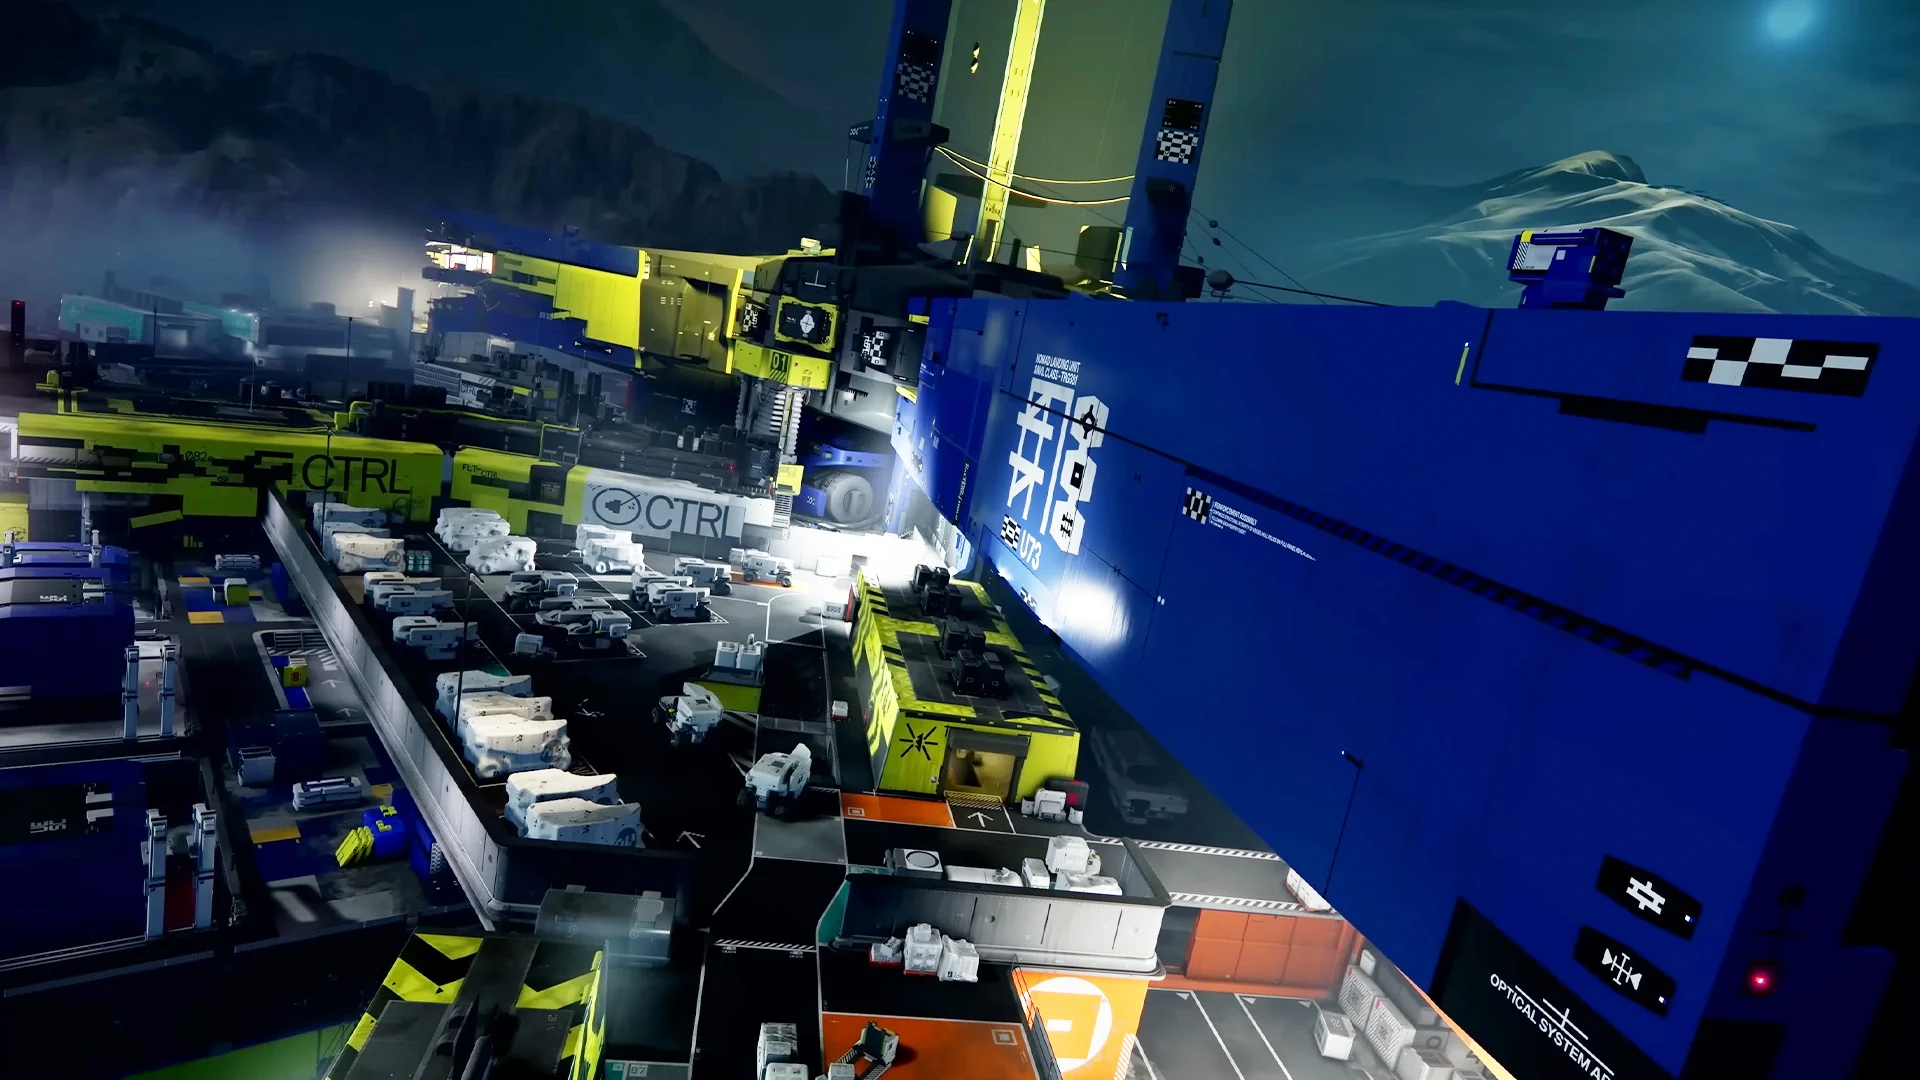
The central structure is Pinwheel Base — a compact, corkscrew-shaped building that holds the most valuable loot on the entire map. Getting inside is the main objective for most squads, and there are multiple ways to do it. The other locked areas feed into or surround Pinwheel. Understanding how they connect is what separates a clean run from a wipe.
Buy services for
Marathon!
Get help with the parts of the game that take the most time. Browse available services or place a custom order.
Order
How to Unlock Outpost: Runner Level 12 Explained
There’s only one requirement to deploy on Outpost — Runner Level 12. No special quest, no faction unlock, no hidden prerequisite. Once you hit Level 12, Outpost appears in the deployment menu alongside the other maps.
Most players reach Level 12 in two to four hours of regular play. Faction contracts are the fastest XP source on the way there. Running them consistently while completing matches on other maps gets you to Outpost without grinding long.
Marathon Outpost Clearance Codes: All Types and Where to Find Them
Clearance codes are the core item system that gates locked rooms on Outpost. There are three color types and each one spawns and works differently. Knowing what to look for — and where — saves you from spending the first five minutes of a match looting the wrong places.
| Code Color | Where to Find It | How to Collect It |
|---|---|---|
| Green | Inside buildings — desks, counters, shelves | Walk up and pick up, no interaction timer |
| Red / Orange | Rooftops of major POIs | Interact with terminal, wait a few seconds |
| Yellow | White box machines inside buildings | Activate the machine, collect the code after |
One thing players miss early on: check the terminal at the Pinwheel door before you start looting for codes. The terminal tells you exactly which color combination is required for that match. It changes every run. Going in blind and grabbing two green codes only to find out you needed red and yellow is one of the most common time-wasters on this map.
Red codes and the Master Clearance Code (used for Exfil Stations) share the same rooftop terminal type — a red interface with a yellow antenna. If you’re hitting rooftops for one, you might as well grab both at the same time.
How to Get Inside Pinwheel Base: All 3 Entry Methods
Pinwheel Base has three separate entry points, and each one suits a different situation depending on what you’ve looted and how much time you have.
How to Open the Command Wing — The Highest-Value Room on Outpost
Getting into Pinwheel Base is only half the job. The Command Wing — the area with the best loot drops in the entire match — has its own separate lock that most players don’t know about the first time they visit.
Once you’re inside Pinwheel and have taken the elevator up, go through the large UESC blue-and-white door. Inside, there are two blue terminals that need to be activated: the first is in the left room immediately after the door, and the second is deeper inside in the right room. Both terminals have to be used before the Command Wing door will unlock. The door itself has two panels on either side — they’ll stay dark until both interior terminals are active.
After the door opens, expect a fight. Four UESC units spawn immediately. Clear them and push through the wing. The final section throws multiple waves of UESC at you — including enemies with purple shields, which take significantly more damage to break. Weapon lockers and high-value containers are scattered throughout the wing, including in side rooms. Don’t rush straight to the end — check everything on the way.
How to Unlock Exfil Stations with Master Clearance Code
On Outpost, Exfil Stations are locked by default. You can’t just walk up and extract — you need a Master Clearance Code to activate one.
Master Clearance Codes come from rooftop terminals: the same red-interface, yellow-antenna terminals used for Orange/Red key codes. These terminals appear on the rooftops of Orientation, Flight Control, Dormitories, and Tarmac. There’s also a named enemy — the Tox Warden, usually found near the Dormitories — who drops a Master Clearance Code on death, making it a solid alternative if you’d rather fight than search rooftops.
If you’ve burned through the match and have no Master Clearance Code, there’s a fallback: one Exfil Station opens automatically when the timer hits zero. The catch is that every surviving player in the match knows this and will converge on that same point. Going there without a code puts you in a third-party killzone at the worst possible moment. Get the code early, use it before the rush, and exfil clean.
Optimal Outpost Locked Room Route: Fast Loot Without Getting Wiped
The biggest mistake on Outpost is treating it like a free-roam scavenge run. The map rewards a specific order of operations. Here’s the most efficient route once you’re comfortable with the layout:
- Check the Pinwheel door terminal immediately — note which code colors are required this run
- Hit rooftops early to grab Red/Orange codes and the Master Clearance Code in the same loop
- Collect Green codes from building interiors as you move between POIs
- Enter Pinwheel using whichever method fits your inventory — codes, Conveyance keycard, or generator panels
- Use codes on the elevator terminal, survive the UESC wave, ride up
- Activate both blue terminals inside the UESC door to unlock the Command Wing
- Push through Command Wing — clear purple-shield UESC waves, loot all side rooms
- Use your Master Clearance Code to exfil before the timer forces the free Exfil rush
If you find two matching codes early, go straight to Pinwheel and skip extra looting. Time on Outpost is the gap between a clean run and getting third-partied mid-loot. The faster you’re in and out of Pinwheel, the less likely another squad catches you with your hands in a container.
Buy services for
Marathon!
Get help with the parts of the game that take the most time. Browse available services or place a custom order.
Order
Most Common Mistakes at Outpost Locked Rooms (And How to Avoid Them)
These are the errors that kill runs most often — not from PvP, but from bad decisions made before the fight even starts.
- Entering Pinwheel while UESC patrols are still active outside — the hacking event draws more UESC and you’ll get hit from two sides
- Skipping the Pinwheel door terminal and collecting random code colors — wastes five to ten minutes and often burns the run
- Looting the Command Wing slowly when another team is still alive in the base — the UESC waves broadcast your location to everyone
- Forgetting the weather — acid rain and fire zones keep ticking damage while you’re mid-loot inside an open area
- Holding the free Exfil Station without a code — it’s the single most camped chokepoint on the map when the timer expires
- Treating the Conveyance Request keycard as a single-use item you have to find fresh — if you extracted one from a previous run, bring it
Final Thoughts
Outpost has a clear system — it just doesn’t explain it to you. Once you understand the code colors, the three entry methods, the two-terminal unlock for the Command Wing, and how exfil works, the map stops being confusing and starts being a reliable source of top-tier gear.
The learning curve here is sharper than other maps, but the payoff is real. Squads that run Outpost blind lose to squads that know the route. Learn the route once, and every run after that is just execution.