











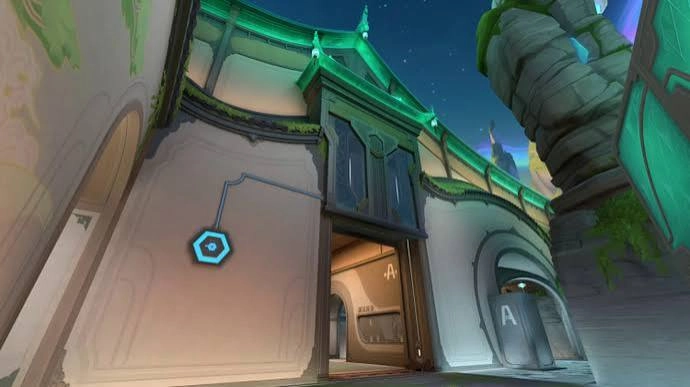
Summit is the first VALORANT map where a single button press can change the entire round. The map has three droppable walls, one on A Site, one on B Site, one in Mid, and each one is triggered by shooting a switch panel next to it. Once a wall falls, it stays down. There’s no reopening it, no second chance, no waiting for the round to reset it.
That permanence is what makes wall timing the single most important skill on this map. A wall dropped at the wrong second can hand the enemy team a free rotation cut, expose your own flank, or trap a teammate underneath it. A wall dropped at the right second can end a round before it really starts. This guide breaks down when and why to trigger each of the three walls, so you stop guessing and start using them on purpose.
How Summit's Wall Mechanic Actually Works
Each switch panel has 125 HP, so two shots from most rifles will bring a wall down. Sova’s Shock Bolt and a handful of other utility abilities can also trigger a panel from a distance, which matters more than it sounds like on first read.
A few rules apply to all three walls:
- The wall closes permanently once activated. It cannot be reopened for the rest of the round.
- Anyone standing under the wall when it closes dies. This includes agents in supposedly invulnerable states, like Yoru or Clove during their ultimates.
- Walls can be triggered from range with the right utility, meaning you don’t always need to walk up and shoot the panel yourself.
That last point changes how you should think about wall control. You’re not just deciding when to drop a wall, you’re deciding who gets close enough to do it safely, and whether ranged utility is the smarter option.
Why Timing Beats Location Every Time
New players tend to treat the walls like a checklist: find the switch, shoot it, move on. That’s the wrong instinct. The wall’s location never changes, but the value of dropping it does, depending entirely on when you pull the trigger.
Drop a wall too early and you tell the enemy exactly what your team is doing before you’ve committed to it. Drop it too late and you lose the chance to cut off a rotation that’s already halfway to the site. The map doesn’t punish you for using the walls. It punishes you for using them without a plan.
Before triggering any wall, ask three things:
- Does this cut off my own rotation as much as the enemy’s?
- Is a teammate still on the other side of this wall?
- Am I dropping this because it helps the round, or just because I’m standing next to the switch?
A Site Wall Timing: Attack and Defense
The A Site wall sits close to the plant zone, which makes it one of the more situational calls on the map.
On attack, the strongest window is right after the plant, once your team has cleared the immediate area. Dropping the wall here removes one of the defenders’ retake paths and forces them to commit through a narrower angle. Dropping it before the plant, on the other hand, usually just gives away that your team is pushing A.
On defense, the wall is most useful when you’re low on numbers and need to buy time. Closing it off after a defender dies can stop a full retake push in its tracks and force attackers into a slower, more predictable execute through the remaining lane.
The common mistake here is activating the wall out of instinct the moment someone reaches the switch. If your team hasn’t finished clearing angles or a teammate is still repositioning, wait.
Mid Wall Timing: The Most Debated Call on the Map
Mid is the connective tissue of Summit. It links to both sites, which makes the Mid wall the hardest one to use well. Drop it at the right moment and you can isolate a site for a clean split attack. Drop it at the wrong moment and you cut off your own rotation path along with the enemy’s.
This wall rewards teams that talk to each other. Before shooting the Mid switch, someone on the team needs to confirm nobody is planning to rotate through Mid in the next few seconds. A wall dropped mid-rotation doesn’t just block the enemy, it can trap your own teammate on the wrong side of the map for the rest of the round.
The strongest use case is late in a round, once your team has already decided which site to commit to. At that point, closing Mid removes the defenders’ fastest rotation option and buys your attackers extra time to execute without a full rotate arriving.
B Site Wall Timing: Attack and Defense
B Site plays larger than A, with more vertical space around B Tower, which changes how the wall gets used compared to its A Site counterpart.
On attack, the wall is strongest once your team has already taken space on site and wants to lock that space in. Triggering it early, before you’ve cleared common defensive angles, usually just alerts the defense and wastes the element of surprise.
On defense, holding the wall in reserve is often better than using it immediately. A defender who drops the B wall the moment the round starts loses a tool that could have shut down a late retake or an unexpected flank later on.
| Wall | Best Time to Drop (Attack) | Best Time to Drop (Defense) | Common Mistake |
|---|---|---|---|
| A Site | Right after the plant, once the site is clear | When defenders are outnumbered and need to slow a retake | Dropping it too early and revealing the push |
| Mid | Late round, after committing to a site | Rarely used defensively; mostly denies attacker rotation | Trapping a teammate on the wrong side |
| B Site | After taking space on site | Held in reserve for a late retake or flank | Using it immediately instead of saving it |
Agents That Get the Most Out of Wall Control
Not every agent benefits equally from Summit’s wall mechanic. A few stand out because their kit lets them interact with the switches in ways other agents can’t.
- Sova can trigger panels from a distance with Shock Bolt, letting him activate a wall without exposing a teammate to the switch.
- Cypher thrives on the information control the walls create, since a closed wall combined with his cameras narrows down where the enemy can possibly be.
- Sage benefits from the slower, more methodical pace the walls encourage, especially on defense where holding a smaller space becomes easier once a rotation path is gone.
This isn’t a full agent guide, and it doesn’t need to be. The point is simple: if your comp includes ranged trigger options, use them, because they let you activate a wall without putting a player’s life on the line to do it.
Common Wall Timing Mistakes to Avoid
A short list of the mistakes that show up most often, even in higher-rank lobbies:
- Shooting a switch without telling the team first
- Dropping Mid before confirming no one needs that path to rotate
- Activating a wall while a teammate is still crossing through it
- Using the B wall immediately instead of saving it for a later retake
- Treating every wall the same way instead of reading the round state first
Quick Wall Strategy Checklist
- Confirm your team’s rotation plans before touching any switch
- Use ranged utility to trigger a wall when it’s available
- Save the Mid wall for after your team has committed to a site
- Drop the A and B walls once you’ve already cleared the immediate area, not before
- Never trigger a wall without a callout first
