











Beyond the Rails is the main endgame mode in Neverness to Everness, and it’s the reason most players care about building a second team. Every two weeks the Special Routes reset, new Anomaly conditions rotate in, and your Annulith income depends entirely on how far you push. Miss a cycle and you’re falling behind on pulls.
The mode looks approachable at first — you ride a ghost train, fight enemies at each stop, and collect Platform Seals for rewards. But once you hit the split-team stops, things tighten up fast. Version 1.1 added the Uncharted Circle as the new Special Route, with its own Resonance buffs and enemy lineup that rewards specific team archetypes.
This guide covers everything you need: how to unlock the mode, how both route types work, how to spend Shadowquill without wasting it, and how to build two functional teams for the Inbound and Outbound phases.
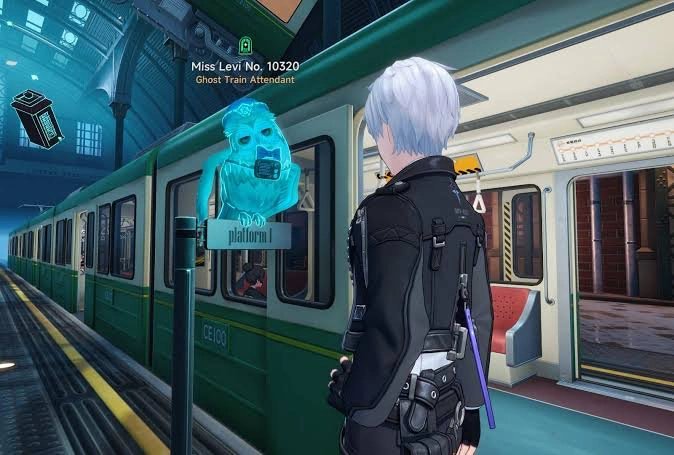
How to Unlock Beyond the Rails in NTE
You need Hunter Level 12 before the mode opens up. Once you hit that threshold, head to the train station in Miguel District and complete the quest Norms on the Anomaly Express with Miss Levi to unlock access. In practice, this means clearing Prologue 2 and pushing your Appraisal milestones into the 30–40 range first — the train station area only becomes accessible after you’ve moved through enough of the Miguel District storyline.
The Norms on the Anomaly Express quest also rewards a Train Ticket, 60 Annulith, 15,000 Fons, and some character upgrade materials. It’s worth completing for the rewards alone, but it’s part of the same content cluster as Beyond the Rails — finishing it and unlocking the mode usually happen at the same time.
Don’t rush it if your roster isn’t ready. Enemies inside the mode sit around level 60, and early stops will punish underleveled characters fast.
Buy services for
NTE: Neverness to Everness!
Get help with the parts of the game that take the most time. Browse available services or place a custom order.
Order
All-Day Routes vs Special Routes: How the Mode Is Structured
Beyond the Rails splits into two types of routes that you work through in order — All-Day Routes first, Special Routes after. They differ in how they reset, what Resonance Effects they use, and how much Annulith you can farm from them.
| All-Day Routes (Fractured Circle) | Special Routes (Uncharted Circle in 1.1) | |
|---|---|---|
| Stops | 10 | 12 |
| Resets | Never | Every 14 days |
| Resonance Effect | Law of Stacking Blades | Changes per cycle |
| Max Platform Seals | 30 | 36 |
| Total Annulith | 1,600 (one-time) | 800 per reset |
| Train Log Total | 700 (one-time) | 840 per reset |
All-Day Route rewards are claimed once and never reset. Special Route rewards reset on a 14-day cycle, so they’re your main repeating income source. Clearing Special Routes as far as possible every cycle is where most of your long-term Annulith comes from.
Prime Circle vs Fracture Circle: Which Difficulty to Target
Beyond the Rails has two difficulty tiers running side by side. Prime Circle is the standard tier — the intended first endgame target once you finish the prologue and clear the unlock thresholds. Fracture Circle is the harder tier, currently the highest difficulty in the game. It’s designed for a fully built roster with strong Arcs, leveled modules, and awakening progress.
Some players cleared Fracture Circle before hitting the level 50 cap, but it’s the exception. If your characters are still in the middle of progression, start with Prime Circle and work up. The reward difference doesn’t justify forcing Fracture Circle on a weak roster — you’ll lose too much time per stop and still miss Platform Seal conditions.
Platform Seals and Annulith: Full Reward Breakdown
Every stop gives you up to 3 Platform Seals depending on whether you meet the clear conditions shown before the fight — usually a time target. Every 3 Seals trigger a reward milestone.
All-Day Route (Fractured Circle) — one-time rewards:
- Seals 1–15: 160 Annulith + 60 Train Log per 3 Seals
- Seals 16–30: 160 Annulith + 80 Train Log per 3 Seals
- Total: 1,600 Annulith and 700 Train Log
Special Route — resets every 14 days:
- Seals 1–24: 75 Annulith per 3 Seals
- Seals 25–36: 50 Annulith per 3 Seals
- Total per cycle: 800 Annulith, 840 Train Log, 200,000 Fons
One mechanic worth knowing: once you earn 18 Seals in a Special Route, every 3 Seals after that grant auto-progress for the next Special Route cycle. Hit all 36 Seals, and the next reset starts you at Stop 8 instead of Stop 1. It’s a significant time save if you can clear deep enough.
Train Logs go to the Otherworld Salvage Station shop, where you exchange them for Elite Hunter Guides and Chaotic Dyes — both useful for character and Arc progression.
How Inbound and Outbound Phases Work (and Why You Need Two Teams)
Starting at Stop 6, each stop splits into an Inbound phase and an Outbound phase. The two phases require completely separate teams — no character can appear in both. This is the point where most players hit a wall if they’ve been running a single strong DPS with filler supports.
The general split:
- Inbound — usually mob groups, works well with AoE damage and crowd control
- Outbound — usually a boss, needs sustained single-target DPS
Pick your two strongest teams and commit to them. Resources for character upgrades are limited, so spreading investment thin across five or six characters makes both teams worse. Lock in your two squads early and focus all upgrade materials on them.
Shadowquill and Otherworld Resonance: How the Buff System Works
Every stop in Beyond the Rails has an active Resonance Effect — a passive modifier that changes how the fight plays out. In the Fractured Circle (All-Day Routes), this is always Law of Stacking Blades: Basic Attack damage builds up to 10 stacks on your active character and resets when you swap. Teams that rely on multi-hit Basic Attacks or resource generation through Basic Attacks benefit most here.
The Special Routes run their own Resonance Effect that changes each cycle. In Version 1.1’s Uncharted Circle, the active effect buffs Anima and Cosmo teams and also increases damage dealt to broken enemies. Always check the current Resonance before building your teams — a team that works in Fractured Circle won’t necessarily perform the same in a Special Route with different buff conditions.
Shadowquill is the currency you spend to activate optional Skill Effects at each stop. Here’s how it works:
- You can assign up to two Skill Effects per stop — one for Inbound, one for Outbound
- Once a specific skill is assigned anywhere in the route, it’s locked and can’t be used again in that same route
- Costs range from 50 to 200 Shadowquill. Lower-cost options give passive bonuses (like +8% Anima damage). Higher-cost options are active, single-use effects — things like a 20% ATK boost for 60 seconds or a black hole that groups enemies
- Skills can be refunded for their full cost if you reassign them
The most common mistake here is spending Shadowquill too early on easy stops where you don’t need it. Save the high-cost active effects for the Outbound boss phases starting at Stop 6. The passive bonuses are more forgiving to use earlier.
Uncharted Circle Guide: The Version 1.1 Special Route
The Uncharted Circle is the Special Route active in Version 1.1. It runs 12 stops and carries a Resonance Effect that buffs Anima and Cosmo teams while also amplifying damage against enemies in a Broken state. This means teams built around Break mechanics hit harder than usual — the mode actively rewards setting up Break and bursting during that window.
Recommended characters for the Uncharted Circle: Nanally, Daffodill, Lacrimosa on the DPS side. Haniel, Sakiri, Jiuyuan, Hotori, Esper Zero in support and grouping roles.
General team structure that works across most stops:
- Inbound phase:
Use Jiuyuan to group enemies, then apply Haniel’s buffs to the clustered group. Switch to Esper Zero and trigger his Redirection Skill to set up a reaction for Nanally, then run Nanally’s combo to burst down the group. - Outbound phase:
Sakiri pulls enemies together, Hotori buffs the team, then bring in Daffodill for her ultimate burst. Lacrimosa with the Black Tome as her copied skill maximizes AoE damage across the remaining targets.
Watch out for: Leech Spawn’s underground attack. When they burrow, they deal continuous damage that can stunlock your characters. Dodge it or kill Leech Spawns before they get the opportunity — letting that land mid-rotation will cost you the time target.
How to Build Teams for Beyond the Rails
Team composition matters more than raw character strength in this mode. A well-structured team on weaker characters will clear faster than a mismatched team with stronger ones.
A few rules that apply across every route:
- Match the active Resonance Effect first. If the route buffs Basic Attacks, play characters that chain Basic Attack sequences. If it buffs Anima, your Inbound team should have Anima characters.
- Check Enemy Details before every stop. The mode shows enemy composition in advance — mob groups and bosses need different approaches. AoE setups that shred through mobs will lose time on single-target boss phases.
- Elemental weaknesses reduce challenge duration. Hitting the right weakness doesn’t just deal more damage — it shortens the fight timer threshold you need to hit for Platform Seals.
- Crowd control is often worth more than a second DPS. Characters like Jiuyuan and Sakiri that group enemies let your damage land on multiple targets at once. On mob stops, this frequently determines whether you hit the 3-Seal time condition.
- Trigger Esper Cycle when possible. Hitting elemental weaknesses and then completing an Esper Cycle on top of that stacks the damage bonus and can shave significant time off a stop.
Why You're Failing Beyond the Rails — And How to Fix It
Most clears that fall apart come down to the same handful of mistakes:
- Bringing underleveled characters. Level difference hits hard in NTE. If your team is 10+ levels below the stop’s enemies, you’ll spend too much time surviving to hit time targets.
- Running only one built team. Works until Stop 6. After that, a weak Outbound team will cost you Seals on every boss stop.
- Spending Shadowquill on early stops. Passive buffs on Stop 1 or 2 are wasted. The stops where you actually need help are the Outbound boss phases in the back half of the route.
- Skipping Enemy Details. Going in blind with the wrong team type wastes your attempt and forces a redo.
- Misusing Otherworldly Supplies. Each item is single-use. Once you equip it to a stop, it’s spent there — you can only get it back by replaying that stop without the item equipped. Don’t throw a high-value supply on a stop you can already clear comfortably. Save them for stops where you’re falling just short of the time condition.
- Ignoring crowd control. Mob stops often feel like a damage problem when they’re actually a positioning problem. Getting enemies grouped before the burst rotation can turn a 2-Seal clear into a 3-Seal one.
Buy services for
NTE: Neverness to Everness!
Get help with the parts of the game that take the most time. Browse available services or place a custom order.
Order
How to Maximize Annulith Every Reset in Beyond the Rails
Beyond the Rails is the closest NTE has to a permanent endgame benchmark. The Fractured Circle sits there every version as a baseline, and each new Special Route raises the ceiling with a fresh set of modifiers and enemy setups. Understanding the buff system, managing your Shadowquill, and building two functional teams matters more here than it does anywhere else in the game.
The Uncharted Circle in Version 1.1 favors Break-focused and Anima/Cosmo team archetypes. If your roster has Nanally, Daffodill, or Lacrimosa built up, you’re in a good position. If not, focus on covering elemental weaknesses and using crowd control to compensate — you can still pull solid Seal counts even without the optimal lineup.
The 14-day reset cycle is unforgiving if you skip it. Log in, push as far as possible each cycle, and let the Annulith compound into pulls over time.
