











Altar of Fangs is the only brand-new dungeon in the Midnight Season 2 Mythic+ pool, and it shows. Three bosses, a 29-minute timer, and nobody in your group has old routes to fall back on. Every other dungeon in the rotation has some history behind it. This one doesn’t.
That makes the first few weeks messy. Groups pull too much, miss the totems that gate the path to the first boss, or wipe on Death Rattle because half the raid forgot to run. None of that is complicated once you know what’s coming. It just takes one clean explanation instead of five conflicting YouTube guides.
This guide covers the route through the dungeon, what to interrupt and when, and how to handle each of the three bosses on Mythic+. Everything below reflects the live Season 2 tuning.
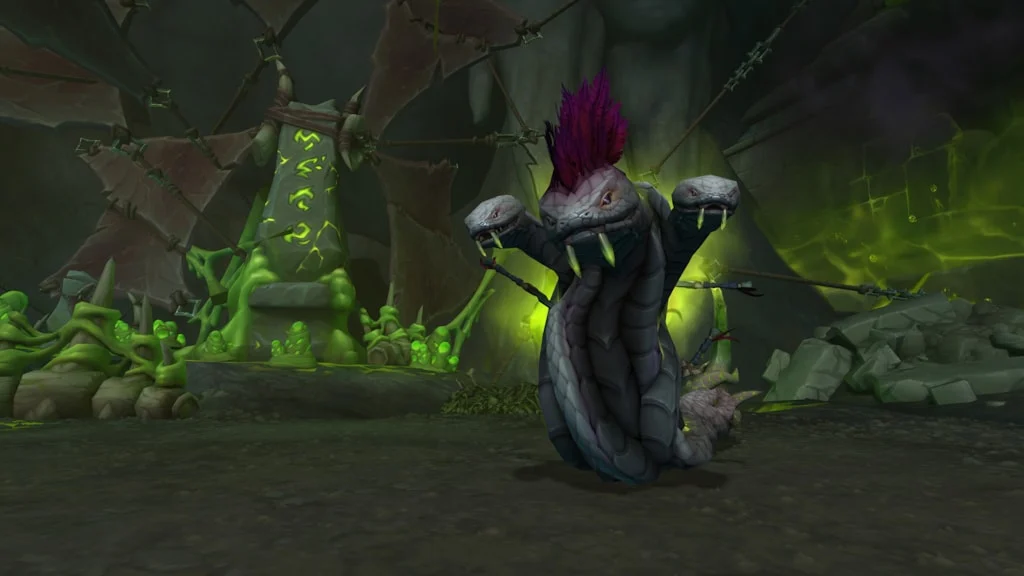
Altar of Fangs at a Glance
| Bosses | 3 — Rav'i, The Writhing Coil, Zul'jan |
| Location | The Coiled Isle, inside the Vaults of Atal'Utek |
| Required level | 90 |
| Difficulties | Heroic, Mythic, Mythic+ |
| Mythic+ timer | 29 minutes |
| Mount drop | The Writhing Brood (Zul'jan, Mythic and Mythic+ only) |
Where to Find the Altar of Fangs Entrance
Three gates lead into the Vaults of Atal’Utek. Pick whichever is closest to where you’re standing:
- /way #2509 47.2 67.6 — Altar of Fangs Entrance
- /way #2512 43.3 44.2 — Gate of the Serpent Eye
- /way #2512 45.4 65.9 — Gate of the Eastern Fang
- /way #2512 31.8 64.9 — Gate of the Western Fang
Once you’re inside, the actual dungeon entrance sits toward the north of the vaults. Time a +10 or higher and you unlock Path of Venomous Evolution in your spellbook, a direct teleport to the entrance. Get this early. Swimming and running in every single run adds up fast over a season.
The Best Pull Route Through Altar of Fangs
The layout is tighter than most Midnight dungeons, which is both good and bad. Good because the trash doesn’t sprawl. Bad because packs sit close together, so a pull that goes slightly wide grabs three groups instead of one.
Two things about the route that aren’t obvious the first time through:
Every totem in the opening area has to be clicked before Rav’i becomes accessible. This isn’t optional trash. Spread your group out while clearing so someone’s always near the next totem, instead of finishing the pull and then realizing nobody’s clicked anything.
The Ascendant Serpent after boss two is a mandatory kill. It’s an elite standing between The Writhing Coil and Zul’jan, and you cannot walk past it. Budget time for it like you would a boss, not a skip.
There’s also a small trick worth knowing. The dungeon has clickable Cursed Bones scattered around. Interacting with one triggers a short cast and spawns a Soothed Amani Spirit, which buffs nearby enemies with roughly 1% increased damage taken for 30 seconds. It stacks a handful of times. On a 29-minute timer, that’s free percentage if someone with a spare global — a healer between casts, a ranged DPS on the run in — clicks a few of these before a heavy pull.
Interrupt and Dispel Priority
This is where most avoidable deaths happen. Nothing here is hard to execute. It’s just easy to forget when there are five other things going on.
Interrupt these:
| Ability | Source |
|---|---|
| Piercing Hiss | Primal Serpent (trash before Rav'i) |
| Paralyzing Shots | Twinfang Harrower (trash before Rav'i) |
| Ravenous Claws | Ravenous Descendant (trash before Rav'i) |
| Regurgitate | Rav'i |
| Toxic Atrophy | The Writhing Coil |
| Envenom | High Evolutionist (trash before Writhing Coil) — CC it if interrupts are on cooldown |
Dispel these:
| Ability | Source |
|---|---|
| Mass Envenom | Ula'tek's Chosen (trash before Zul'jan) |
| Mass Envenom | High Evolutionist (trash before Writhing Coil) — only if the debuff lands |
One more thing worth flagging for tanks: Ravenous Descendant gets a short but nasty attack speed buff. It doesn’t last long, so a stun or a quick kite resets it. Trying to heal through it with cooldowns instead is a waste of a cooldown.
Boss 1: Rav'i
Rav’i is a three-headed hydra, and the fight is really a tank positioning puzzle wearing a boss fight costume.
The arena is covered in Carrion Piles. When Rav’i runs low on energy, she runs to the nearest one and starts eating, which gives her an absorb shield and applies stacking Nature damage to the whole group every 3 seconds until the shield drops.
That’s the baseline. Here’s what changes it: her Ravenous Stomp ability knocks Twinfangs out of the air, and they drop Fresh Meat onto whichever Carrion Pile is nearby. If the pile she runs to next has Fresh Meat sitting on it, she goes into Feeding Frenzy instead of normal eating — the damage tick speeds up to every 1.5 seconds, and she gains 30% attack speed on top of it.
So the entire strategy for this fight comes down to one job: your tank needs to track which piles have Fresh Meat on them and keep the boss away from those piles when her energy runs out. Nail this and the fight is calm. Miss it a couple times in a row and your healer is out of mana by key level 12.
A few other things to watch:
- Messy Eater throws meat chunks around the pit while she eats. On Mythic+, chunks that nobody catches explode into extra damage — so these need to be intercepted, not dodged, which trips people up the first time.
- Triple Shot hits three players with a lingering ground effect. Spread out when it’s coming.
- Regurgitate sends acid waves at a target, slowing and weakening whoever gets hit. Dodge it, interrupt it when you can.
- Ravenous Stomp hits everyone and drops stunning stalactites. Move out of the impact zones.
Quick role breakdown: tanks manage boss position relative to Fresh Meat, DPS breaks the shield fast and catches meat chunks, healers just need to survive until the shield comes down.
Boss 2: The Writhing Coil
This is the gimmick fight of the dungeon, and it’s the one most groups wipe on first.
Death Rattle is the mechanic that ends runs. It stacks damage on everyone, and the stacks pile up faster the longer it goes. Orweyna attaches vines to the group, and to stop the cast, everyone attached needs to run 10 yards away from the boss. Not most people. Everyone. If even one player forgets to move, the cast keeps going and the group dies.
Say this out loud before your first pull: everyone runs on Death Rattle. It sounds obvious written down. It is not obvious mid-fight when three other mechanics are happening at once.
Running successfully splits the boss into five separate snakes — this is the Uncoil phase. Here’s the part most groups don’t realize: damage you deal during Uncoil carries over once the snakes reassemble. That makes Uncoil your real burst window, not an inconvenient add phase to survive through. Save cooldowns for it instead of dumping them on single-target.
Other mechanics to track:
- Toxic Atrophy needs to be interrupted every time. It’s cast three times in a row, and each unstopped cast slows the group and cuts damage output. Three stacks and your DPS falls off a cliff. Assign this to specific interrupts in advance.
- Burrowing Charge — the boss burrows in a line. Get out of the way.
- Venom Jet — a cone in front of the boss. Don’t stand there.
- Spiteful Hunt (Mythic+ only) — during Uncoil, snakes fixate players and apply a stacking poison on contact. Kite it, don’t tank it.
Boss 3: Zul'jan
The final boss punishes groups that show up without a plan. Zul’jan wields the Fang of Ula’tek, and most of the fight revolves around managing what that dagger does to the room.
Ritual of the Fang sends out four beams that need soaking. If a beam connects with Zul’jan instead of a player, he gains a permanent stacking damage buff called Fang Empowered — and it never falls off for the rest of the fight. Assign four soak positions before you pull, not during the cast. The beams spawn in fixed spots, so there’s no reason to improvise this.
Soaking a beam gives you Ritual Venom, a stacking debuff that sits for 50 seconds and then bursts for heavy damage. On Mythic+ it stacks, which means it needs active management. Two things clear it:
- Bloodletting, triggered by Zul’jan’s physical hits, removes venom but leaves damaging blood pools on the ground.
- Boneslicer is the one worth knowing. Soaking a single Boneslicer axe throw clears every stack of Ritual Venom you’re carrying, all at once.
That flips Boneslicer from something you avoid into a tool you use on purpose. If a player is sitting on multiple venom stacks, they should step into the next Boneslicer line intentionally. If they’re not carrying stacks, they should stay clear of it like normal. It’s a small rule, but it’s the difference between a controlled fight and a healer spiraling to keep up with venom bursts.
Axegrinder rounds out the kit — spinning axes that ricochet around the arena and ignore armor, losing speed as they bounce. Pure movement check, dodge it. Chop Down is a two-hit physical combo on the tank, standard cooldown timing handles it.
Pre-Pull Checklist
Run through this before your key starts, not halfway into the first pull:
- Assign an interrupt rotation for Toxic Atrophy on The Writhing Coil — it casts three times back to back
- Lock in four beam soak positions for Zul’jan’s Ritual of the Fang before you engage
- Tell the group out loud: everyone runs on Death Rattle
- Tank tracks which Carrion Piles have Fresh Meat and stays away from them
- Click Cursed Bones on the way in for the stacking damage buff
- Click every totem in the opening area before pulling Rav’i
- Remind everyone: soak Boneslicer when carrying Ritual Venom stacks, avoid it otherwise
Loot and Key Level Breakpoints
A few breakpoints matter more than the rest of the table. Hero-track crests start dropping at key level 4, so there’s little reason to farm below that. Myth Mistcrests kick in at +9, one level earlier than most players expect. And +10 is where the Great Vault jumps to Myth track gear, which also happens to be the level that unlocks the dungeon teleport.
| Key Level | End of Dungeon | Crest | Great Vault |
|---|---|---|---|
| +4 | 298 (Champion 3/6) | Hero Mistcrest | 308 (Hero 2/6) |
| +9 | 308 (Hero 2/6) | Myth Mistcrest | 315 (Hero 4/6) |
| +10 | 311 (Hero 3/6) | Myth Mistcrest | 318 (Myth 1/6) |
| +12+ | 311 (Hero 3/6) | Myth Mistcrest | 318 (Myth 1/6) |
End-of-dungeon loot caps out at key level 10. A +15 gives the same direct drop as a +10 — what changes above that point is your rating, not your gear. If you’re gearing up rather than chasing a title, +10 is the efficient stopping point.
Altar of Fangs rewards preparation more than raw gear. Learn the Fresh Meat rule, call Death Rattle every time, and pre-assign the beam soaks on Zul’jan, and this becomes one of the faster, more reliable keys in the Season 2 rotation.
