











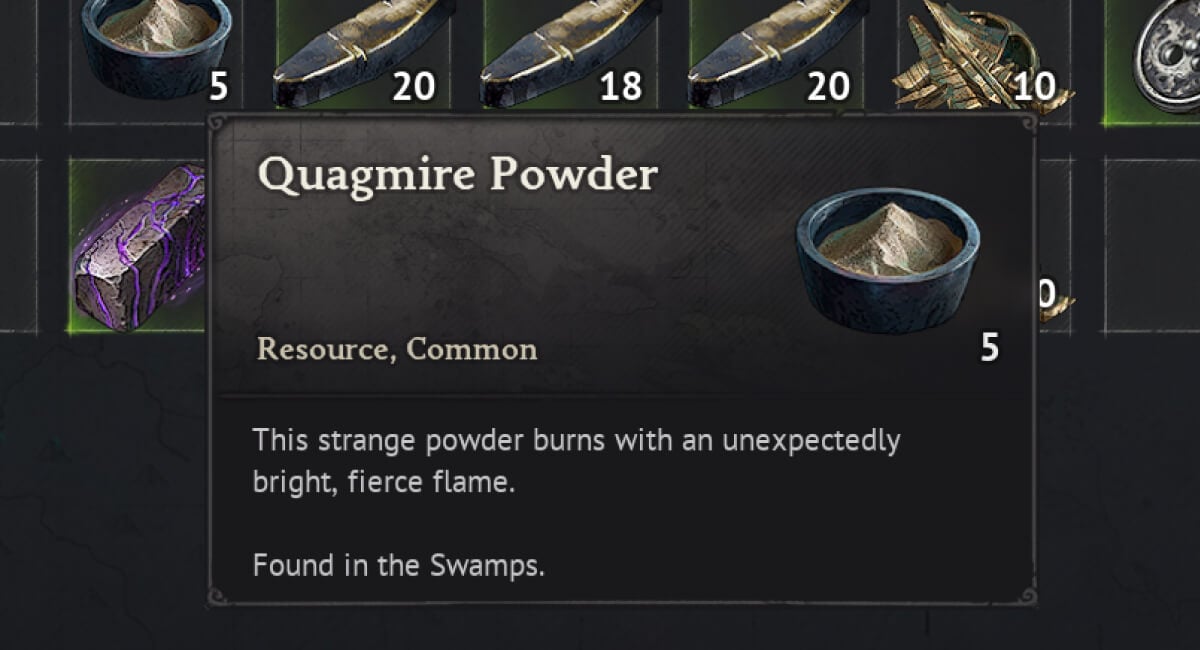
Quagmire Powder is probably the most annoying resource in Windrose’s endgame. You push into the Cursed Swamps, start mining Ancient Scraps by the hundreds, then realize you have almost no Powder to actually smelt them into Mire Metal Ingots. The ratio is brutal: 2 Scraps per 1 Powder per 1 Ingot. Run out of Powder, and your whole crafting chain stops dead.
This guide covers exactly where Powder spawns, which enemies to prioritize, how farming changes with a crew, and what builds speed up clearing. It also breaks down a realistic time estimate for the full Shipwright Workshop upgrade — and where a resource boost actually saves you the most time.
What Is Quagmire Powder Used For in Windrose?
Quagmire Powder has one confirmed use: smelting Mire Metal Ingots at the Large Smelting Furnace. The recipe is 1 Quagmire Powder + 2 Ancient Scraps = 1 Mire Metal Ingot.
Mire Metal Ingots are what unlock the final tier of weapons, armor, and ship gear — the stuff you need before taking on the hardest content in the game. No Ingots means no upgrades. No Powder means no Ingots. That’s why this material becomes a wall for so many players.
The Powder itself is almost entirely combat-obtained, which is part of what makes it a grind. You can’t mine it or harvest it from a node. You have to kill things.
Buy services for
Windrose!
Get help with the parts of the game that take the most time. Browse available services or place a custom order.
Order
Where Quagmire Powder Spawns in the Cursed Swamps
Unlock the Biome First
You can’t touch Quagmire Powder until you’ve reached the Cursed Swamps. For most players, this is the third biome — it opens up after the Foothills. There’s no shortcut. Progress through the earlier regions, then push into the swamps when they become available.
Best Quagmire Powder Locations (Ranked)
| Location | Enemy Types | Enemy Level | Notes |
|---|---|---|---|
| Ancient Debris Sites (×4) | Thralls, Hunters | Lv. 12 | Best consistent farm, low risk |
| Tainted Ruins of an Ancient Temple | Mixed Plague enemies | Lv. 15 | Highest density, max-gear only |
| POI Chests (Ruins, Priestess Huts, Crypt Houses) | None | — | One-time only, up to 11 per chest |
Ancient Debris Sites are the go-to. There are four of them across the Cursed Swamp islands — three islands have sites, with one island holding two. Enemies here are Level 12 Thralls and Hunters, which are fast to kill and drop Powder reliably. A full sweep of all four sites takes roughly 15–20 minutes and nets around 40–50 Quagmire Powder.
The Tainted Ruins of an Ancient Temple packs more enemies into a smaller space, which sounds great until you’re fighting Level 15 enemies with mid-tier gear. Save this spot for when you’re fully kitted out.
POI Chests are worth clearing on your first visit — individual crypt chests can hold up to 11 units at once. Just know they don’t respawn. Once looted, they’re gone. Use them to get a head start, not as a farming loop.
Set Up Fast Travel Before You Start
Before your first run, drop a Fast Travel Bell at the swamp entry point. Place your Fast Travel location as close to the Ancient Debris sites as possible. This alone cuts a few minutes off every rotation, and those minutes add up across multiple farming sessions.
How to Farm Quagmire Powder Efficiently — Solo vs Crew
Solo Farming
The most reliable solo loop is the Ancient Debris route. You chain the four sites in order, kill every Thrall and Hunter you see, and reset when the respawn timer hits (roughly 120–150 minutes per site).
A few things to keep in mind:
- Plague Thralls and Hunters have a 100% drop rate for Quagmire Powder. Every kill counts.
- Plague Witches drop 1–2 Powder per kill and are easier than most other Plague types — don’t skip them.
- Plague Warriors are slow to kill and drop at most 2 Powder. At low gear levels, the time cost isn’t worth it. Skip them early on and come back when your damage is higher.
- Plague Crushers don’t drop Quagmire Powder at all. Don’t waste time on them.
The core rule for solo: don’t skip enemies on your route. Every Thrall you walk past is a guaranteed drop left behind.
Crew Farming (Co-op)
With a crew, you can split the farming loop. While one player clears Thralls and Witches for Powder, another handles Crocodiles for Tainted Bile. This way you’re stacking two resource chains at once instead of making separate trips.
The efficiency gain is real. A group of three can cover the full Ancient Debris rotation in closer to 8–12 minutes versus 15–20 solo, and the Tainted Ruins become a much safer farming spot when you’re not tanking Level 15 enemies alone.
If you’re farming with a crew, the Temple is worth adding to your route once everyone is geared up. It’s the highest-density spot in the biome, and clearing it with backup is genuinely fast.
Best Builds for Quagmire Powder Farming
Your build affects how fast you clear enemies, which directly affects how many farming rotations you can fit into a session.
Precision build (Rapier of a Thousand Cuts + 4-piece Flibustier’s Attire) — the all-rounder. Fast attack speed, bleed stacking, low stamina cost. Works well against every Plague enemy type and holds up against elites. Push Precision to 20 first, then split between Endurance and more Precision. This is the build most farming guides recommend for a reason.
Musket build (ranged) — Plague enemies are weak to ranged attacks, and the Musket clears groups faster than most expect. No self-sustain through weapons, so you’re kiting the whole time, but if you can land headshots consistently, it’s actually one of the quickest clear options. Bring plenty of Gunpowder and Bullets.
Blunderbuss + Saber (Agility) — strong for crew play where someone else handles single targets. The Blunderbuss shreds groups at close range and pairs well with fast melee follow-up. Solo it’s slightly less efficient than the Precision build, but it’s forgiving if enemies pile up.
For max-gear farming at the Tainted Ruins specifically, the Rapier of Devastation and Plague Halberd are the top picks. They handle Level 15 enemies fast enough to make the Temple viable as a repeatable farm.
Don't Farm Quagmire Powder in Isolation
Here’s a mistake worth avoiding: farming Powder without tracking your Ancient Scraps at the same time. You need twice as many Scraps as Powder, so if you run out of Scraps mid-session, your Ingot production stops regardless of how much Powder you have.
The practical fix is to mine Ancient Scraps from the Debris sites while you clear enemies. You’re already there — the mining nodes are right next to the enemy spawns. Keep both resources moving in parallel.
Also worth combining: Tainted Bile farming. Crocodiles are all over the Cursed Swamps, and Tainted Bile feeds into Ingot Arborum later. If you wait to farm Bile separately, you’ll hit another resource wall further down the upgrade path. Clear Crocodiles during the same runs where you’re clearing Plague enemies, not after.
And the POI chests — do these the first time you visit each area. You won’t be able to loot them again, so there’s no reason to save them for later. Bank that early Powder and use it to push your first few Ingots before the grind fully sets in.
How Long Does the Full Shipwright Workshop Upgrade Actually Take?
What the Upgrade Requires
The final Shipwright Workshop upgrade comes from crafting the Bellows, which is only available after you reach the Cursed Swamps. To build a Bellows you need:
- Mire Metal Ingots
- Hewn Stone (requires a Level 3 Workbench)
- Crocodile Hide Pieces
Before you can even smelt Mire Metal Ingots, you need to build the Large Smelting Furnace, which costs Hewn Stone, Iron Ingots, and Clay. There’s a setup phase here — don’t expect to walk into the swamp and immediately start upgrading.
Realistic Time Breakdown
One full Ancient Debris sweep = ~15–20 minutes = ~40–50 Quagmire Powder (with Scraps stocked).
Most players need 3–5 full rotations to accumulate enough Mire Metal Ingots for the Bellows craft plus a meaningful stock of Tier 11 ship gear. At 15–20 minutes per rotation and a ~120–150 minute respawn timer, that means waiting through 1–2 respawn cycles between runs unless you’re combining Ancient Debris with the Temple.
| Scenario | Estimated Time |
|---|---|
| Solo, following the Ancient Debris route | 3–6 hours active farming |
| Crew of 3+, combining Debris + Temple | 1.5–3 hours |
| Solo, max gear, farming the Temple | ~2–4 hours |
These are active farming hours, not total session time. If you’re clearing Scraps, Bile, and Powder in the same run, the overall session is more efficient even if it takes longer per lap.
How a Resource Boost Saves Time Here
The slowest part of the whole process is the first two rotations. Your gear isn’t optimized yet, kill speed is slower, and you’re still learning the route. A resource boost — whether through an in-game mechanic that increases drop rates or an external stack of pre-farmed materials — cuts this startup phase and lets you enter the Cursed Swamps already close to the Ingot count you need.
For players with limited time, this is where the difference actually matters. Arriving at the upgrade threshold with half your Powder already stocked means skipping the grind, not the gameplay. The Temple and Debris clears are still there — you’re just not doing the slowest version of them at the worst gear level.
Quagmire Powder Farming — Quick Reference
| Factor | Best Option |
|---|---|
| Primary farming spot | Ancient Debris Sites (×4) |
| Best enemy targets | Plague Thralls, Plague Witches |
| Skip entirely | Plague Crushers (no Powder drop) |
| Deprioritize early | Plague Warriors (slow kill, low value) |
| Best solo build | Precision Rapier + Flibustier set |
| Best crew build | Blunderbuss + Agility or Plague Halberd |
| Chest runs | Once per POI, can't repeat |
| Enemy respawn timer | ~120–150 min per site |
| Powder per full Debris sweep | ~40–50 units |
| Time per sweep | 15–20 minutes |
| Full Shipwright upgrade (solo) | 3–6 hours |
| Full Shipwright upgrade (crew) | 1.5–3 hours |
Buy services for
Windrose!
Get help with the parts of the game that take the most time. Browse available services or place a custom order.
Order
Final Notes
The Quagmire Powder grind is one of the more deliberately paced parts of Windrose — the drop rate is clean (100% from Thralls), but volume requires effort. The Ancient Debris route is the most consistent path for most players: low risk, predictable yield, and easy to combine with Scraps and Bile farming in the same trip.
Push through the first two or three rotations and the Bellows upgrade is reachable within a single day of play. After that, the Shipwright Workshop opens up Tier 11 ship gear and the endgame loop starts moving properly.
